
Toolsila guide
How to Remove a Background from a Photo (Without Photoshop)
Remove a distracting photo background in your browser, refine the result with a few practical checks, and export a transparent PNG without installing an editor.
ByToolsila Editorial TeamUpdated
The short version
You do not need a full desktop editor to isolate a person, product, pet, or other clear subject. A browser-based remover can identify the foreground, discard the surrounding pixels, and return a PNG with transparency. The whole job can take a few deliberate steps: choose a suitable source, let the model create a first cutout, inspect the boundary, and decide whether that result is good enough for its destination.
Toolsila’s free background remover performs that first pass locally in a compatible browser. Your image is not sent to a Toolsila application server. The model still needs to load into the browser after you select a file, and processing time depends on the device and image. Privacy does not make the result infallible, so the inspection step matters.
A useful expectation: automated removal is strongest when the subject has a distinct outline and differs visibly from the background. Hair, fur, glass, smoke, motion blur, and overlapping colors can produce uncertain edges.
Start with the best source you have
Background removal is a classification problem before it is an editing problem. The model has to decide which pixels belong to the subject. A clean source gives it clearer evidence.
Use the original camera file if possible rather than a screenshot downloaded from a message thread. Repeated JPEG saving softens edges and adds block artifacts. Select a frame where the complete subject is visible, with breathing room around shoes, handles, hair, or packaging. Even lighting is helpful; a hard shadow can be mistaken for part of the object, while a bright reflection can disappear into a pale backdrop.
Do not upscale a tiny image merely to make the dimensions look impressive. Upscaling invents intermediate pixels but does not restore real edge detail. If several photographs are available, pick the one with the clearest separation rather than the largest number in its filename.
Remove the background step by step
- Open the background remover in a current browser with Canvas and WebAssembly support.
- Choose a JPEG, PNG, or WebP file, or move focus to the drop zone and use the keyboard-accessible file control.
- Read the validation message before processing. Toolsila rejects files above 10 MB or 36 megapixels. Images above 12 megapixels are proportionally reduced for processing, and the interface tells you when that happens.
- Wait while the model loads and processes the image. The first run can take longer because the browser needs the model resources.
- Inspect the preview against the checkerboard. Look closely at fine hair, transparent objects, gaps between limbs, and the contact area under a product.
- Download the transparent PNG if the edge is suitable. The filename ends in
-no-background.png.
Reset safely if you chose the wrong source or want to try another photograph. Starting a new job should not leave an older result attached to the current image.
Measured Toolsila example
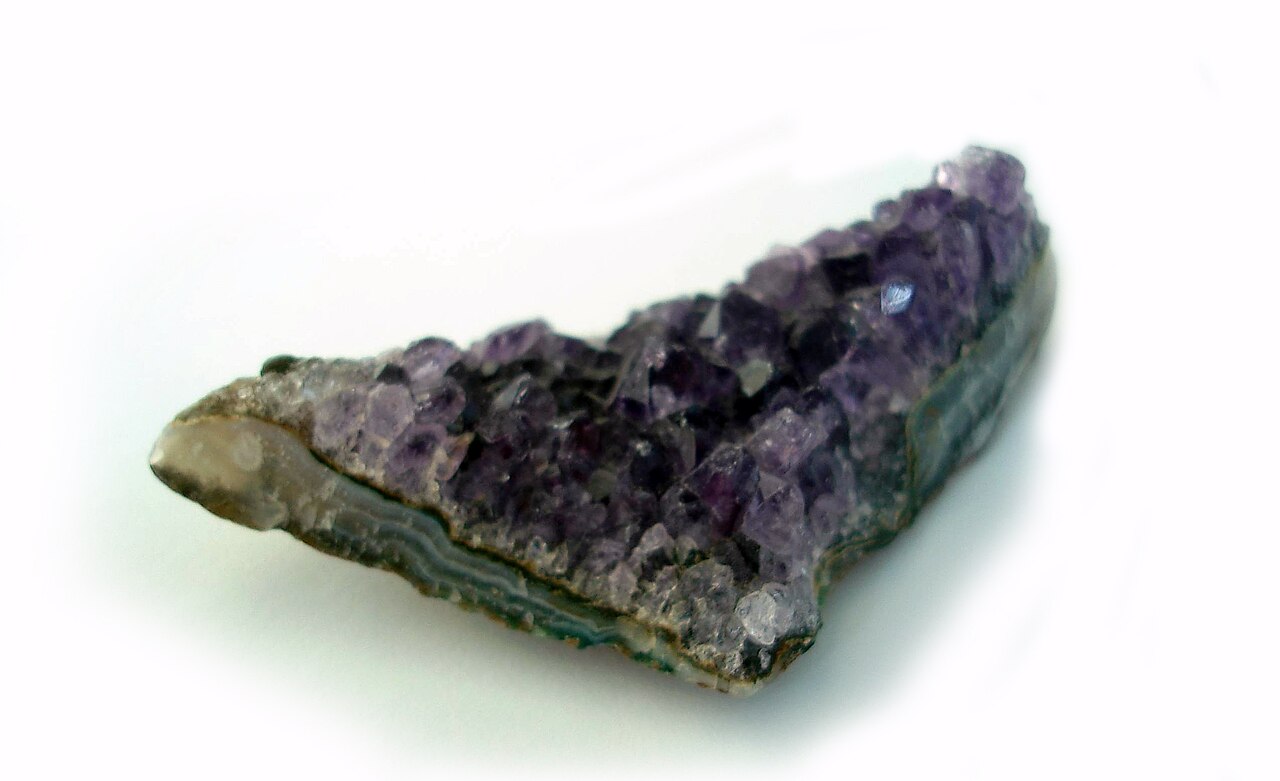
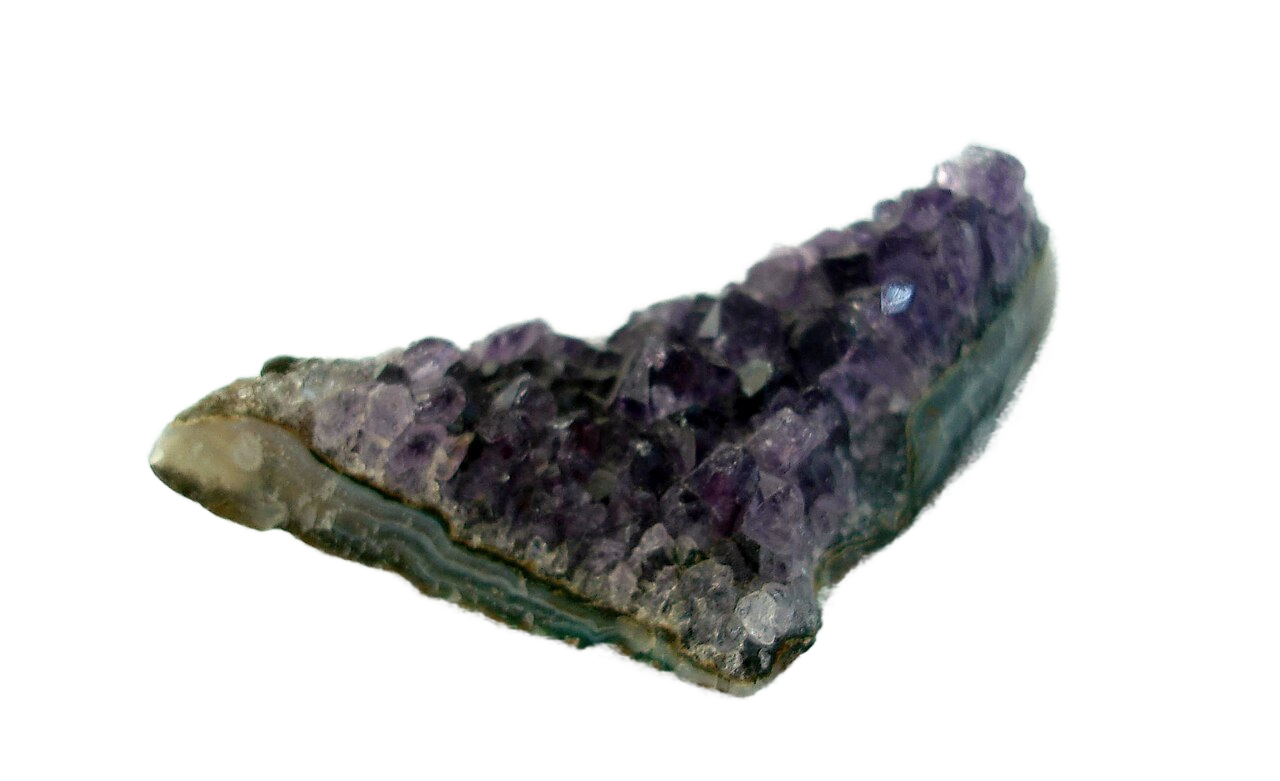
A licensed CC0 amethyst photograph entered the tool as an 83,693-byte, 1280 × 781 JPEG. The current remover produced a 625,304-byte transparent PNG at the same dimensions, with no visual post-processing. The larger result is expected here: PNG carries lossless pixels and alpha rather than acting as a compression step. Review found a slight pale fringe around the irregular crystal and soft contact-shadow edge.

Reproducible evidence
Measured Toolsila background-removal result
Source JPEG · 83,693 bytes
Transparent PNG · 625,304 bytes
- Method
- Processed the attributed 1280 × 781 source once through the published Toolsila remover, downloaded the PNG, and inspected the silhouette, internal gaps, fringe, and contact-shadow edge.
- Settings or conditions
- @imgly/background-removal 1.7.0; current tool defaults; no visual post-processing after download.
- Observed result
- The output stayed 1280 × 781, gained transparency, and measured 625,304 bytes. A slight pale fringe remained around parts of the crystal and soft shadow.
- Test or review date
- August 17, 2026
- Limitations
- This is one clearly separated object. Hair, glass, low contrast, motion blur, device performance, and other browsers can produce different results.
How to judge the cutout
A checkerboard represents transparency; it is not part of the downloaded picture. Still, a cutout that looks acceptable over checks may reveal a fringe over the real destination color. Test it on a light and a dark background before publishing.
Zoom in on three edge types. First, inspect crisp geometry such as a box, phone, or table. Wavy corners usually indicate that the source was soft or the model was uncertain. Second, inspect fine detail such as curls, feathers, and fabric fibers. Losing a few strands can be less distracting than keeping a dirty halo, depending on the final size. Third, inspect semi-transparent material. Veils, glass, and smoke do not have a simple inside/outside boundary, so a one-click mask may flatten them or retain color from the old scene.
Also check holes and negative space. The area inside a mug handle, between bicycle spokes, or between an arm and a torso should be transparent when it belongs to the background. These small regions are easy to miss in a fit-to-screen preview.
What to do when the edge is imperfect
Try a better source before reaching for detailed repair. A second photo with stronger contrast often saves more time than correcting dozens of pixels. Cropping loosely around the subject can reduce irrelevant scene complexity, but never crop through the outline you need.
For a minor halo, place the cutout on its intended background and view it at the final display size. A one-pixel fringe visible at 400% may disappear in a product thumbnail. Conversely, pale residue around dark hair can remain obvious even when small. If precision is essential, open the PNG in an editor that supports masks and use a small brush to add or subtract edge areas. The automated result becomes the starting mask rather than the final authority.
If your goal is a catalog-style result, continue with the workflow in how to make a product photo background white. Transparency and white are different outcomes: transparent pixels reveal whatever sits underneath, while white pixels are permanently filled.
Export without accidentally losing transparency
PNG is the dependable output here because it can store a full alpha channel. JPEG cannot store transparency. If you open the PNG and save it as JPEG, transparent regions must be filled—often white, but sometimes black or another editor-defined color.
Some apps show transparency as white in their preview even when the alpha channel is intact. Confirm by placing the file over a colored layer or reopening it in a transparency-aware editor. The beginner’s guide to transparent background images explains alpha, checkerboards, and format choices in more detail.
Keep the transparent master even when you need a white or branded version today. One clean master can be placed over many backgrounds later. Export destination-specific copies rather than repeatedly editing the only file.
Privacy and practical limits
Browser-local processing means Toolsila does not need an upload endpoint for the image. It does not mean the browser performs no network activity at all: the application and model assets must be delivered, just like the rest of a website. Once available, the selected image is processed on the device by the tool rather than posted to a Toolsila server.
Device limits still apply. Very large files can consume substantial memory, which is why validation and proportional downscaling exist. Managed browsers, old devices, blocked WebAssembly, or missing Canvas capability may prevent processing. The interface should translate those failures into plain guidance, not expose a raw technical exception.
For sensitive work, follow your organization’s policy even when a tool is local. For ordinary product, profile, or presentation images, the combination of a strong source, a careful preview, and a transparent master provides a practical way to remove a background without buying or learning Photoshop.
Sources and review notes
Editorial update: September 2, 2026. PNG alpha behavior is summarized from the W3C PNG specification. The browser requirements, limits, model loading, and local-processing path reflect the current Toolsila Background Remover. The update adds the attributed source, untouched output, method, settings, measured result, and limitations visibly to the guide.
Review before you export
- Check the cutout over light, dark, and final destination backgrounds.
- Keep the transparent PNG master before making a white or branded delivery copy.